For teachers
How to create a material
A material is your own set of lessons in the Materials section. It lives on the Personal tab, and its lessons can later be added to any class. Here is how to create one, fill in its card and add the first lesson.
On this page
How to do it
Open the Materials section
The Personal tab holds the materials you created yourself. The other tabs — From classes, Boards, School and Catalogue — show other shelves. Click the “Create a material” button in the page header.
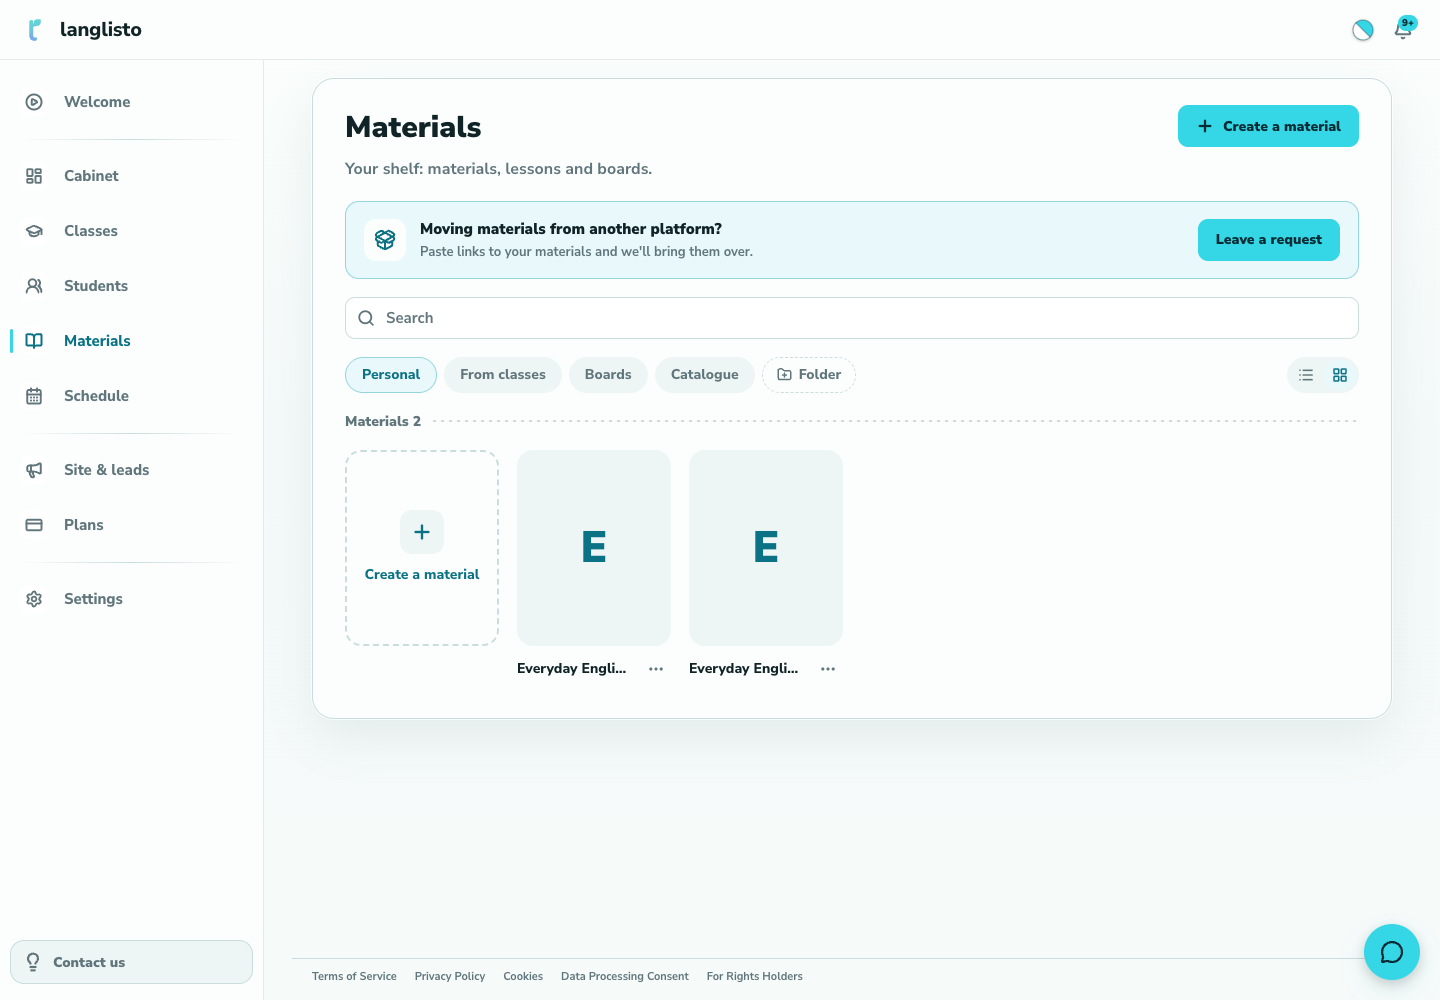
1. Open the Materials section Fill in the material card
Enter the title, an optional description, and the language you teach. You can enable Sections to group lessons. Click Create.
Look around the material
The material opens in place of the list. The Contents tab shows lessons, the Settings tab holds the language and accent. The title and cover are edited right in the header. “Back to materials” returns you to the list.
Add a lesson
The first lesson is created with the material. Rename it using the pencil beside its title, then open it with Edit. Use Add a lesson for later topics. Inside each lesson, exercises are arranged in sections.
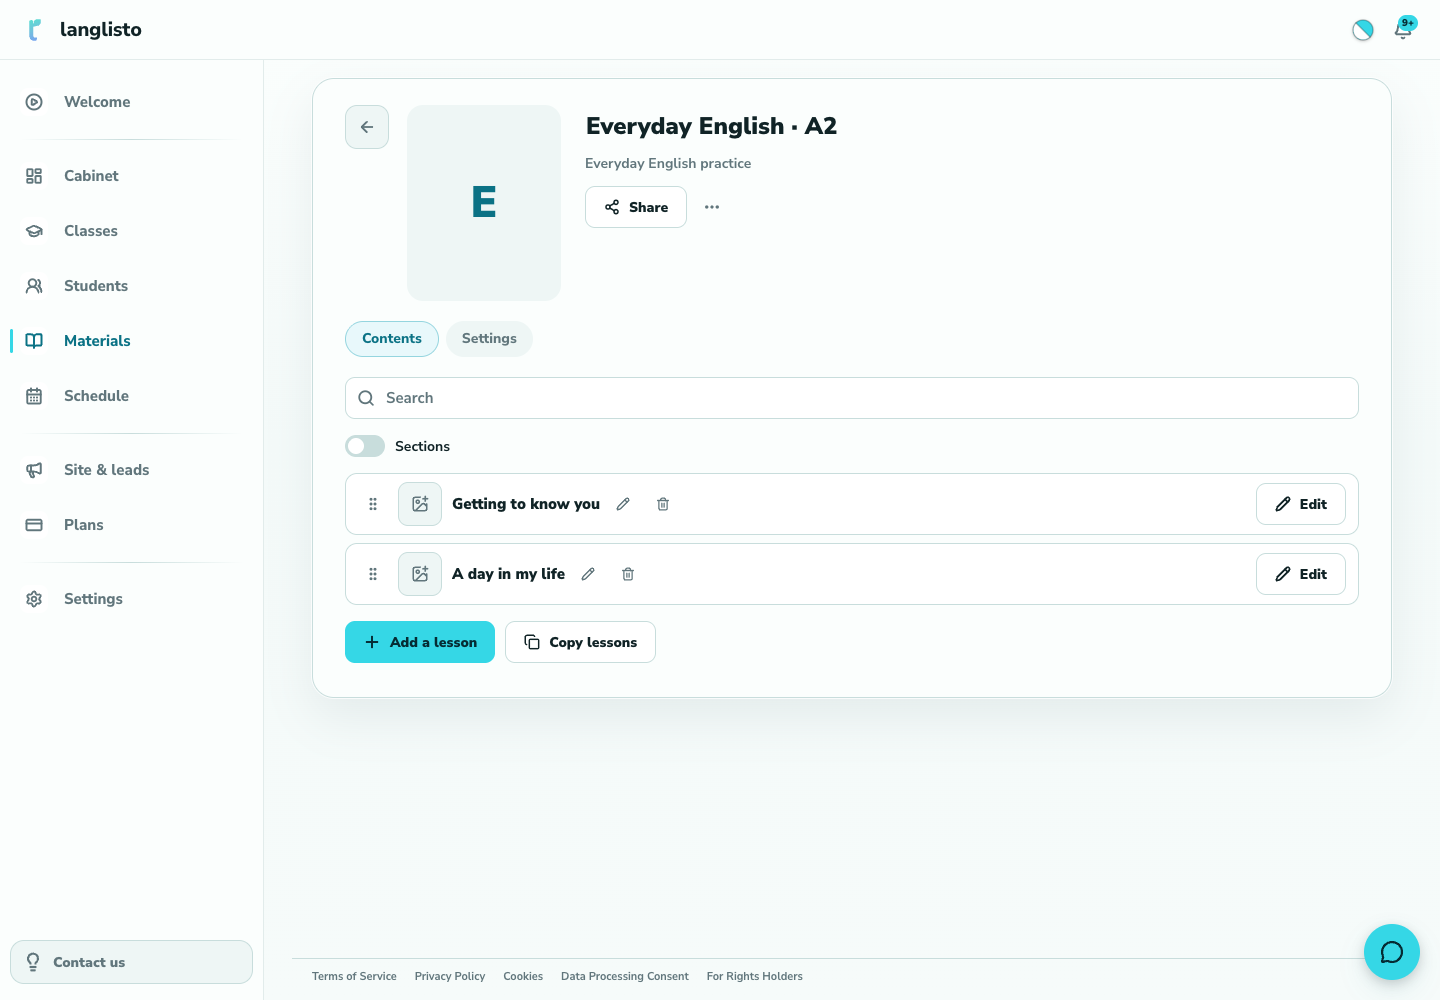
4. Add a lesson
Good to know
Troubleshooting
I don't see the “From classes” tab
It appears only when you have lessons created directly inside a class. Until then the tab is hidden — this is expected.
I opened a material but can't edit it
Only your own materials are editable. Materials from the School tab open read-only — copy the lessons you need to your own material first.